Background and Build-Up To The Massacre
Historian John Head looks at how and why the Norfolk Regiment came to be at Le Paradis
INTRODUCTION
Much prominence has rightly been placed on the heroism on the beaches of Dunkirk and the defence of Calais by the King's Own Rifle Corp, the Queen Victoria Rifles and the Rifle Brigade but there were other small groups of soldiers who made the ultimate sacrifice by staying behind when they could have retreated to potential safety – the 2nd Glosters and the 4th Ox and Bucks at Cassels, the 5th Glosters at Ledringhem, the 2nd Royal Warwicks at Esquelbecq/Wormhout and the 1st Royal Scots at Le Cornet Malo /Le Paradis.
These selfless acts KEPT THE CORRIDORS TO DUNKIRK OPEN FOR A FURTHER THREE DAYS enabling a staggering 338,000 allied servicemen to be evacuated – far more than the original estimate of 45,000 given by Winston Churchill. The miracle of Dunkirk became a retreat to final victory. This is the account of one such battalion that stayed behind - the 2nd Battalion Royal Norfolks who paid the ultimate sacrifice to secure the freedom we enjoy today. Liberty comes at a very high price and therefore should be cherished. It is something we should never forget.
HOW DID THE NORFOLKS FIND THEMSELVES WHERE THEY WERE?
Following the Franco Prussian War in 1871, Germany realised it could be fighting a war on two fronts. West – France: East - Russia following these countries ‘secret’ alliance in 1894. In 1897 Kaiser Von Wilhelm II and Otto Von Bismarck approached German Chief of Staff, Alfred Von Schlieffen, to deliver a plan that would allow Germany to gain power and assert itself as a dominant state. The plan took nine years to devise and was presented in 1905 (revised in 1906). The plan became more acute following the Entente Cordiale in 1904 between Britain and France.
THE SCHLIEFFEN PLAN - See also our map section
The Schlieffen Plan imagined a huge hammer-blow at Paris, using 90 per cent of the German army, swinging down through Belgium and northern France, to take out France in a quick, decisive campaign.
Schlieffen concluded that it would take Russia six weeks to mobilise while France and Germany could both be prepared for battle within 15 days.
He believed that if France could be conquered within that short time period, German troops could then be moved to a new front against Russia. A quick German victory over France would lead to sequential, not simultaneous fighting. To accelerate the transfer of troops between future fronts, Schlieffen advised the Kaiser to build efficient railroads to move troops easily from west to east.
The plan was entrusted to, and would be implemented by, Helmuth Von Moltke the Elder a German Field Marshal and formerly Chief of Staff of the Prussian Army. Unfortunately Moltke the Elder died in 1891, the plans then being passed to his son Helmut Von Moltke the Younger who was General Chief of Staff. Helmut Von Moltke the Younger proceeded to water down the plans based on the following assumptions:
However:
Russia took only ten days to mobilise and Moltke was forced to send some troops to the eastern front, which weakened the main attack on Paris.
Belgium refused to grant permission for Germany to go through its territory, so the German Army had to fight its way through Belgium. This slowed it down and tired the soldiers, particularly as Belgium open its floodgates in many areas.
Britain decided to uphold its 1839 Treaty with Belgium.
The British Expeditionary Force (BEF) arrived to resist the Germans and held them up at the Battle of Mons on 23rd August, 1914.
There was a successful French Counter attack on The Marne.
THE OUTBREAK OF THE SECOND WORLD WAR and THE SCHLIEFFEN PLAN (SEPTEMBER 1939-MAY 1940 a period known as THE PHONEY WAR)
The Allies believed the Second World War would be a re-enactment of the Schlieffen Plan (and to an extent it was).
Problems
General Maurice Gamelin (Commander in Chief of overall Allied troops) did not want fighting on French soil and the Belgians wanted to remain neutral even though they were warned of a potential German invasion (Schlieffen Plan).
Gamelin’s Plan
Gamelin worked on the plans to meet the Wehrmacht as far forward as possible to counter a German thrust through Belgium and Holland and committed his forces (including the BEF) to this end.
Several plans were hatched including the (River) Dyle plan and the (River) Escaut plan. This would avoid the fighting on French soil but would encroach on Belgium neutrality. The Dyle plan was chosen.
23rd April, 1940
The armies of Britain and France move into Belgium regardless of the Belgium neutrality. The Royal Norfolks (nicknamed The Holy Boys - a name going back to the 19th century) were placed on six hour notice to advance into Belgium to the river Dyle.
Hitler’s Plan
Hitler's original plan was in favour of the Schlieffen approach and to attack in late November, 1939, before the French and British had time fully to deploy along their front. The main assault was to come in the north, through Belgium and the Netherlands, then wheeling south to capture Paris, leaving the French Army anchored on the Maginot Line.
Senior German Officers, particularly Rundstedt and Manstein, were opposed to both the timing and the plan owing to the offensive being so close to the onset of winter where rivers and canals would hamper armoured operations in the Low Countries. Manstein, in particular, supported by Rundstedt, argued for an armoured assault across the Ardennes to the sea, cutting the British and French off in Belgium.
A combination of bad weather, the arguments of his generals, and a careless breach of security, when the details of the original plan fell into Allied hands known as the Mechelen Affair, eventually led Hitler to agree to postpone the attack until early 1940, when it was again delayed by the German invasion of Denmark and Norway. In February, Hitler finally accepted the Manstein Plan.
The British Expeditionary Force (B.E.F.) and 2nd Battalion The Royal Norfolk Regiment
General Lord Gort V.C. was placed in command of the British Expeditionary Force on 3rd September 1939.
Within the structure of the British Expeditionary Force, the 2nd Battalion The Royal Norfolk Regiment formed part of 4th Brigade which included 1st Battalion The Royal Scots and 1st/8th Battalion The Lancashire Fusiliers.
The General Officer Commanding was Brigadier Edward Warren.
4th Brigade was part of 2nd Division which in turn was part of 1 Corp.
2nd Battalion The Royal Norfolk Regiment was the first British Expeditionary Force (BEF) to land at Cherbourg on 21st September 1939.
2nd Battalion Royal Norfolk's Movements During the "Phoney War."
January 1st to 7th was a significant week for the 2nd battalion of the Royal Norfolk Regiment.
Earlier in October 1939 the battalion moved up to the village of Rumegies on the Belgium frontier constructing a trench network.
Over Christmas the battalion began a tour of duty left of the Maginot line taking up their position close to the village of Walweiss on the Saar front.
Intelligence was of vital importance and on 4th January two patrols were sent out into No Mans Land to reconnoitre the enemy defences. One, under the command of Lieutenant Everitt, returned without incident to claim the credit of being the first British patrol to cross the German border in the war.
The other, under Capt. Peter Barclay, was to gather intelligence behind a network of enemy barbed-wire and to take a prisoner for identification purposes. The patrol split into two with 2nd Lieutenant Murray Brown providing cover from a railway embankment whilst Capt. Barclay and Lance Corporal H.M.Davis investigated a house in search of a prisoner. During the search of the house the enemy was alerted and a fire-fight ensued. The now split patrol managed to return to their line in safety albeit independent of each other and without a prisoner but armed with vital intelligence. For this audacious action Capt. Barclay was awarded the Military Cross the first BEF officer to be decorated in the war. Lance Corporal Davis was awarded the Military Medal and the remainder of the patrol was mentioned in dispatches.
Attempting to emulate the accomplishment of Capt. Barclay, Lieutenant Everitt on 7th January (refer to O’Callaghan’s diary notes in respect of 6th/7th January) took a patrol close to an enemy position. Sadly he became detached from his patrol and the enemy, being alert to what had happened before, peppered his position mortally wounding him. He died in a German hospital and was buried in Germany with full military honours. Lieutenant Everitt was the first BEF officer to be killed in action in France during the war.
After a month’s tour the Norfolks returned to Rumegies before being assigned to the Divisional Reserve based at Orchies in February preparing a new defensive line.
In March they moved to Rubempré close to Amiens for ten days of battalion training before returning to Orchies. By the spring the Norfolk officers were aware of Plan D (Dyle). The Royal Scots, Royal Norfolks and Lancashire Fusiliers would be on the extreme right of the BEF forming a junction with the French Army. The Norfolk’s would take up position at Wavre moving quickly from Orchies via Valenciennes, Rumegies crossing the frontier at Port Cailloux.
THE MANSTEIN PLAN (Fall Sichelschnitt)
This was the genesis of the blitzkrieg of May, 1940. It would comprise of:
INTRODUCTION
Much prominence has rightly been placed on the heroism on the beaches of Dunkirk and the defence of Calais by the King's Own Rifle Corp, the Queen Victoria Rifles and the Rifle Brigade but there were other small groups of soldiers who made the ultimate sacrifice by staying behind when they could have retreated to potential safety – the 2nd Glosters and the 4th Ox and Bucks at Cassels, the 5th Glosters at Ledringhem, the 2nd Royal Warwicks at Esquelbecq/Wormhout and the 1st Royal Scots at Le Cornet Malo /Le Paradis.
These selfless acts KEPT THE CORRIDORS TO DUNKIRK OPEN FOR A FURTHER THREE DAYS enabling a staggering 338,000 allied servicemen to be evacuated – far more than the original estimate of 45,000 given by Winston Churchill. The miracle of Dunkirk became a retreat to final victory. This is the account of one such battalion that stayed behind - the 2nd Battalion Royal Norfolks who paid the ultimate sacrifice to secure the freedom we enjoy today. Liberty comes at a very high price and therefore should be cherished. It is something we should never forget.
HOW DID THE NORFOLKS FIND THEMSELVES WHERE THEY WERE?
Following the Franco Prussian War in 1871, Germany realised it could be fighting a war on two fronts. West – France: East - Russia following these countries ‘secret’ alliance in 1894. In 1897 Kaiser Von Wilhelm II and Otto Von Bismarck approached German Chief of Staff, Alfred Von Schlieffen, to deliver a plan that would allow Germany to gain power and assert itself as a dominant state. The plan took nine years to devise and was presented in 1905 (revised in 1906). The plan became more acute following the Entente Cordiale in 1904 between Britain and France.
THE SCHLIEFFEN PLAN - See also our map section
The Schlieffen Plan imagined a huge hammer-blow at Paris, using 90 per cent of the German army, swinging down through Belgium and northern France, to take out France in a quick, decisive campaign.
Schlieffen concluded that it would take Russia six weeks to mobilise while France and Germany could both be prepared for battle within 15 days.
He believed that if France could be conquered within that short time period, German troops could then be moved to a new front against Russia. A quick German victory over France would lead to sequential, not simultaneous fighting. To accelerate the transfer of troops between future fronts, Schlieffen advised the Kaiser to build efficient railroads to move troops easily from west to east.
The plan was entrusted to, and would be implemented by, Helmuth Von Moltke the Elder a German Field Marshal and formerly Chief of Staff of the Prussian Army. Unfortunately Moltke the Elder died in 1891, the plans then being passed to his son Helmut Von Moltke the Younger who was General Chief of Staff. Helmut Von Moltke the Younger proceeded to water down the plans based on the following assumptions:
- Russia would take at least six weeks to mobilise.
- Belgium would not resist any German attack.
- Britain would remain neutral.
- France would be easily defeated in six weeks.
However:
Russia took only ten days to mobilise and Moltke was forced to send some troops to the eastern front, which weakened the main attack on Paris.
Belgium refused to grant permission for Germany to go through its territory, so the German Army had to fight its way through Belgium. This slowed it down and tired the soldiers, particularly as Belgium open its floodgates in many areas.
Britain decided to uphold its 1839 Treaty with Belgium.
The British Expeditionary Force (BEF) arrived to resist the Germans and held them up at the Battle of Mons on 23rd August, 1914.
There was a successful French Counter attack on The Marne.
THE OUTBREAK OF THE SECOND WORLD WAR and THE SCHLIEFFEN PLAN (SEPTEMBER 1939-MAY 1940 a period known as THE PHONEY WAR)
The Allies believed the Second World War would be a re-enactment of the Schlieffen Plan (and to an extent it was).
Problems
General Maurice Gamelin (Commander in Chief of overall Allied troops) did not want fighting on French soil and the Belgians wanted to remain neutral even though they were warned of a potential German invasion (Schlieffen Plan).
Gamelin’s Plan
Gamelin worked on the plans to meet the Wehrmacht as far forward as possible to counter a German thrust through Belgium and Holland and committed his forces (including the BEF) to this end.
Several plans were hatched including the (River) Dyle plan and the (River) Escaut plan. This would avoid the fighting on French soil but would encroach on Belgium neutrality. The Dyle plan was chosen.
23rd April, 1940
The armies of Britain and France move into Belgium regardless of the Belgium neutrality. The Royal Norfolks (nicknamed The Holy Boys - a name going back to the 19th century) were placed on six hour notice to advance into Belgium to the river Dyle.
Hitler’s Plan
Hitler's original plan was in favour of the Schlieffen approach and to attack in late November, 1939, before the French and British had time fully to deploy along their front. The main assault was to come in the north, through Belgium and the Netherlands, then wheeling south to capture Paris, leaving the French Army anchored on the Maginot Line.
Senior German Officers, particularly Rundstedt and Manstein, were opposed to both the timing and the plan owing to the offensive being so close to the onset of winter where rivers and canals would hamper armoured operations in the Low Countries. Manstein, in particular, supported by Rundstedt, argued for an armoured assault across the Ardennes to the sea, cutting the British and French off in Belgium.
A combination of bad weather, the arguments of his generals, and a careless breach of security, when the details of the original plan fell into Allied hands known as the Mechelen Affair, eventually led Hitler to agree to postpone the attack until early 1940, when it was again delayed by the German invasion of Denmark and Norway. In February, Hitler finally accepted the Manstein Plan.
The British Expeditionary Force (B.E.F.) and 2nd Battalion The Royal Norfolk Regiment
General Lord Gort V.C. was placed in command of the British Expeditionary Force on 3rd September 1939.
Within the structure of the British Expeditionary Force, the 2nd Battalion The Royal Norfolk Regiment formed part of 4th Brigade which included 1st Battalion The Royal Scots and 1st/8th Battalion The Lancashire Fusiliers.
The General Officer Commanding was Brigadier Edward Warren.
4th Brigade was part of 2nd Division which in turn was part of 1 Corp.
2nd Battalion The Royal Norfolk Regiment was the first British Expeditionary Force (BEF) to land at Cherbourg on 21st September 1939.
2nd Battalion Royal Norfolk's Movements During the "Phoney War."
January 1st to 7th was a significant week for the 2nd battalion of the Royal Norfolk Regiment.
Earlier in October 1939 the battalion moved up to the village of Rumegies on the Belgium frontier constructing a trench network.
Over Christmas the battalion began a tour of duty left of the Maginot line taking up their position close to the village of Walweiss on the Saar front.
Intelligence was of vital importance and on 4th January two patrols were sent out into No Mans Land to reconnoitre the enemy defences. One, under the command of Lieutenant Everitt, returned without incident to claim the credit of being the first British patrol to cross the German border in the war.
The other, under Capt. Peter Barclay, was to gather intelligence behind a network of enemy barbed-wire and to take a prisoner for identification purposes. The patrol split into two with 2nd Lieutenant Murray Brown providing cover from a railway embankment whilst Capt. Barclay and Lance Corporal H.M.Davis investigated a house in search of a prisoner. During the search of the house the enemy was alerted and a fire-fight ensued. The now split patrol managed to return to their line in safety albeit independent of each other and without a prisoner but armed with vital intelligence. For this audacious action Capt. Barclay was awarded the Military Cross the first BEF officer to be decorated in the war. Lance Corporal Davis was awarded the Military Medal and the remainder of the patrol was mentioned in dispatches.
Attempting to emulate the accomplishment of Capt. Barclay, Lieutenant Everitt on 7th January (refer to O’Callaghan’s diary notes in respect of 6th/7th January) took a patrol close to an enemy position. Sadly he became detached from his patrol and the enemy, being alert to what had happened before, peppered his position mortally wounding him. He died in a German hospital and was buried in Germany with full military honours. Lieutenant Everitt was the first BEF officer to be killed in action in France during the war.
After a month’s tour the Norfolks returned to Rumegies before being assigned to the Divisional Reserve based at Orchies in February preparing a new defensive line.
In March they moved to Rubempré close to Amiens for ten days of battalion training before returning to Orchies. By the spring the Norfolk officers were aware of Plan D (Dyle). The Royal Scots, Royal Norfolks and Lancashire Fusiliers would be on the extreme right of the BEF forming a junction with the French Army. The Norfolk’s would take up position at Wavre moving quickly from Orchies via Valenciennes, Rumegies crossing the frontier at Port Cailloux.
THE MANSTEIN PLAN (Fall Sichelschnitt)
This was the genesis of the blitzkrieg of May, 1940. It would comprise of:
- The armoured assault by Germany across the Ardennes to the sea cutting the British and French off in Belgium.
- The invasion of The Netherlands would be purely diversionary (the Schlieffen Plan).
- A German armoured build up on the Maginot Line would keep the French army pinned down in this sector.
Historian John Head gives a detailed rundown of the position of the Royal Norfolks from May 20th to 28th. To read this click here.


The Gristock VC - 21st May, 1940
On May 21st, 1940, an action by Company Sergeant Major (CSM) George Gristock saw him awarded the Victoria Cross. You can read about CSM Gristock's bravery by clicking here. You will also be able to read Private Ernie Leggett's remembrances of the action around the cement works on the Escaut at that time.
The Yallop Charge - 25th May, 1940
On 10th May, Lieutenant Yallop was second in command of ‘B’ Company Second Battalion Royal Norfolks.
On 21st May, following heavy fighting and casualties, a major reshuffle took place within the Battalion with Lieutenant (Acting Captain) Yallop taking command of ‘A’ Company. This was to lead to what was to become known as the Yallop Charge which you can read about below.
On 21st May, following heavy fighting and casualties, a major reshuffle took place within the Battalion with Lieutenant (Acting Captain) Yallop taking command of ‘A’ Company. This was to lead to what was to become known as the Yallop Charge which you can read about below.
  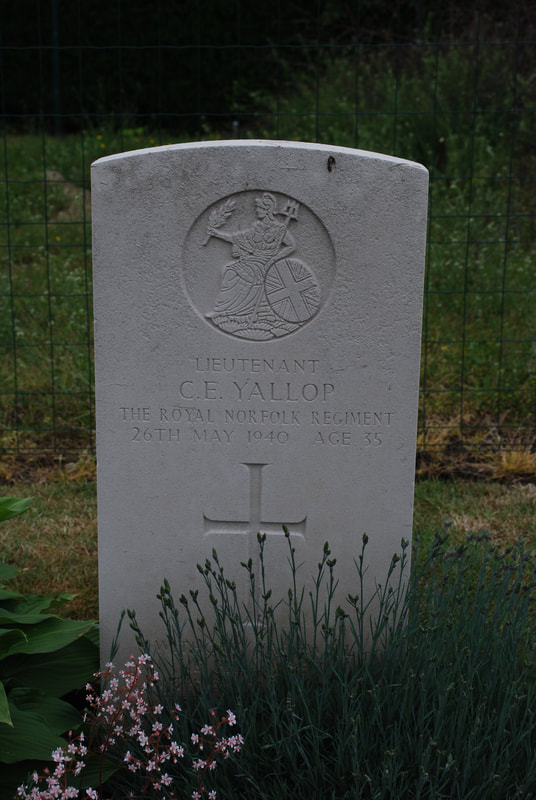 |
LIEUTENANT CECIL ERNEST YALLOP
Died Sunday 26th May 1940 Aged 35 2nd Bn. Royal Norfolk Regiment Son of Ernest Robert and Edith Kate Yallop Husband of Betsy Yallop of Norwich INSCRIPTION WITHOUT FAREWELL HE FELL ASLEEP, WITH ONLY MEMORIES LEFT TO KEEP R.I.P. |
On 25th May, two days before the massacre, there was another example of the courage and resolve of 2nd Bn. Royal Norfolk Regiment, supported by 8th Battalion Lancashire Fusiliers.
Battalion HQ were losing communications with their companies together with their C.O Maj. (Acting Lt Colonel) Ryder who was last reported leaving Brigade HQ at I’Epinette.
Major Ryder, instead of returning to Battalion HQ, had made a detour to organise an attack on a wood (Bois de Pacqueaut) in which the enemy (SS Totenkopf) had successfully penetrated between ‘A ‘Company and the Royal Scots.
Led by Acting Captain Yallop, with the Lancashire Fusiliers under 2nd Lieutenant Spears in support, with bayonets fixed and through a hail of machine gun and rifle fire, the enemy was engaged at close quarters and successfully driven out from their temporary stronghold.
It was a courageous, but costly encounter which decimated the numbers of ‘A’ Company leaving 17 dead, including Acting Captain Yallop.
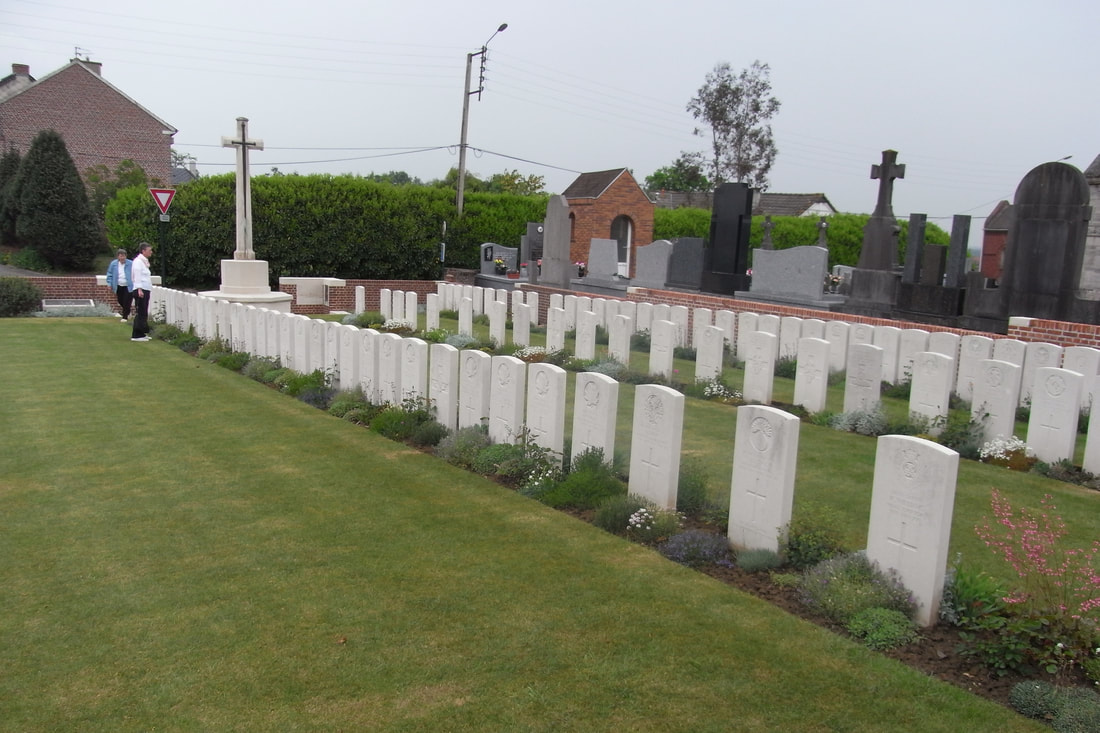
Lieutenant Yallop is buried at Hinges Communal Cemetery. Pictures of his final resting place are included above. Click on them to see larger images.
Battalion HQ were losing communications with their companies together with their C.O Maj. (Acting Lt Colonel) Ryder who was last reported leaving Brigade HQ at I’Epinette.
Major Ryder, instead of returning to Battalion HQ, had made a detour to organise an attack on a wood (Bois de Pacqueaut) in which the enemy (SS Totenkopf) had successfully penetrated between ‘A ‘Company and the Royal Scots.
Led by Acting Captain Yallop, with the Lancashire Fusiliers under 2nd Lieutenant Spears in support, with bayonets fixed and through a hail of machine gun and rifle fire, the enemy was engaged at close quarters and successfully driven out from their temporary stronghold.
It was a courageous, but costly encounter which decimated the numbers of ‘A’ Company leaving 17 dead, including Acting Captain Yallop.
Lieutenant Yallop is buried at Hinges Communal Cemetery. Pictures of his final resting place are included above. Click on them to see larger images.
To read about the surrenders at Duriez Farm and a nearby ditch click here.
A full timeline of the build-up is featured on the massacre section of this web site and can be accessed by clicking here.
A full timeline of the build-up is featured on the massacre section of this web site and can be accessed by clicking here.
The Incident at Pont d'Avelette
In respect of the above we are grateful for the assistance of the families of Ernest Eric ‘Strips’ Farrow and Francis George Porter together with Debbi Lane whose permission we have to reproduce the following from Last Stand at Le Paradis in memory of her late husband Richard Lane.
Also to Elizabeth Jolly and Deborah Duncan-Rees in memory of the late Cyril Jolly author of The Man Who Missed the Massacre whose book also contains much of the following information.
27th May 1940
Two hours before the capture of Le Cornet Malo, ten men from the Pioneer Platoon had returned to Duriez Farm, having spent the night in a ruined cottage supporting ‘D’ Company. Private Ernie Farrow said it was about 08.00 and they were actually hoping to get some food. Almost immediately he found himself part of a small team of ‘volunteers’ detailed to destroy a bridge, the Pont d’Avelette.
‘This bridge’ he explained, ‘had been left intact to let our men over and the artillery had been shelling all round it to stop the Germans getting across…..the time was right for us to blow it’.
Lance Corporal ‘Misler’ Mason was to lead the party and selected his three volunteers by the usual army method: ‘You, you and you!’ – namely Farrow, Porter and Reeve.
There was too much equipment for the men to carry so Major Ryder allowed them to use his car and briefed his driver, Doug Auker, who came from King’s Lynn. No map reference was needed as the bridge was only a short distance, around three miles away and Auker knew exactly where to go.
The boot of the old Humber was filled with amatol, gun cotton and primers, and just before they left they were handed some ammunition.
‘Three rounds of ammunition’, said Farrow, ‘to fight the German Army!’
A sergeant major presented them with a large tin of Bluebird toffees perhaps as recompense of sorts for being unable to obtain any food, although they were promised a hot meal on their return. As they bumped along the road, the car came under sporadic shell and machine-gun fire.
‘We knew’ said Farrow, ‘that one bullet through the back of our car and we could all be blown to pieces. We hoped to God that the driver would get us there as quick as he could’
Throughout the brief drive, they struggled to get the lid off the toffee tin, but had not succeeded by the time Auker called out that the bridge was in front. On their right was the canal and on their left a large farmhouse, from which a German machine-gun immediately opened fire, riddling the car with bullets. Miraculously, neither the occupants nor the explosives in the boot were hit by the burst. Mason, Farrow, Porter and Reeve leapt out of the Humber and headed into the canal.
"The driver was trying to turn his vehicle, to get back to headquarters to warn them that the bridge had already been taken; I suppose that’s what was in his mind. By the time we got into the canal we heard this hell of an explosions, and we were splattered by all the pieces of metal and whatnot as the poor old car was blown up and the driver with it," said Farrow.
Despite the odds, the four men decided to have a final crack at the Germans. They scrambled as best they could up the steep slippery bank and loosed off some rounds at the house, hoping that every precious bullet would count. But they could not safely get out of the canal at this point. With Germans on both sides they would simply be picked off.
‘Right’ said Mason, ‘bolts out of your rifles, get rid of them, because there’s no way they’re needed any more’.
All surplus equipment, including their tin hats, was discarded and they swam away hoping to find a safer spot.
Eventually Mason stopped them and told them to stay where they were and to keep their heads down. ‘I’m going to swim down the canal and find somewhere there’s a ditch runs into the canal where we can climb out. That’s the only way we can get out. We can’t get out where we are now’.
With those words the Lance Corporal swam away. The three remained close together in the rushes: Farrow in the middle, Porter on his left and Reeve on the right. Porter came from Beccles and had joined the Army at the same time as Farrow early in 1938. Instead of keeping his head down, however, Porter decided to have a peep over the top. Farrow recalled:
At that instant, I heard this machine-gun or rifle fire….I turned and looked up. The poor fellow had been shot right through the middle of his head and the back of his head was missing; as quick as that, and he was sinking back into the water. I was trying to hold him up which was no good because he was already dead.
A few moments later, while talking to Reeve, who came from Dickleburgh and had served the Regiment for several years, Farrow felt something hit him in the face. He immediately placed his hand on the area where he had felt the impact and found that it was covered in blood.
‘I looked at the blood and thought I had been hit. I felt again but I was still all there’.
It was actually Reeve’s jaw which had hit Farrow, ripped off by a shot. Farrow continued:
"He was then disappearing underneath. The last thing I saw of him was these two gold teeth shining in the top of his head, and for many, many weeks afterwards, whenever I opened my eyes, I could see his face with no chin and his gold teeth showing. The water round me was red with his blood. But the poor boys, they’d gone, they were at the bottom."
Mason returned a few minutes later. He had found a ditch abutting the canal from where they would be able to clamber out and make their escape. They slipped under the water and swam, coming up from air from time to time.
Here we are’ said Mason presently ‘You stop where you are; that’s an order. Keep your head down. I’ll go and see if there is anything on this meadow.’
While waiting, Farrow was sure he saw a bush move on the left hand side.
Then he heard a mouthful of army language.
I looked and ‘Misler’ had been shot through the shoulder, and the bone of his arm was sticking out of the top. But they couldn’t kill ‘Misler’ like that. He put his arm round my neck to keep himself up……This bush I’d seen, there was a German behind it, probably the one who had shot ‘Mis’.
"Just then he came from behind this bush, jumped in this ditch and came running towards us. When he was about twelve yards from us, he stopped and put his rifle up to his shoulder. I said my last prayer because I knew I was going to die. But the Lord was with me and there was a loud click. He’d run out of ammunition or his breech had stuck. He turned his rifle round, got hold of the barrel and as he got close to us, he took a swipe at my head. I put my arm up to stop him hitting me, and the first blow smashed all my hand up. The next blow came down and I still had the strength to hold my elbow up and he just smashed my elbow and put my shoulder out of joint.
"One more blow I’d have been dead, but that very instant, I heard a loud shout and lots of Germans came into sight. One of these was an officer who’d shouted. They jumped into the ditch and he ordered them to pull us out of the canal. They pulled out poor old ‘Mis’ first. They’d got to be very careful because if they pulled his wrong arm they’d have pulled it off, he was in such a bad state. But he was still alive and they put him on a stretcher and took him away. They pulled me out.
German Propaganda

The following German propaganda leaflets were dropped over Dunkirk